Introduction
Rapid prototyping lets you turn CAD into a physical part in days, not weeks — and that speed is exactly what saves engineering schedules and reduces costly late-stage design errors. If you’ve been burned by inconsistent quality, slow responses, or communication gaps with offshore suppliers, this article gives you a practical, factory-facing playbook: how rapid prototyping works, which methods to pick, DFM checks that reduce rework, and exactly how to work with Chinese manufacturers to get fast, accurate prototypes that scale into production.
This guide is written for engineers and procurement managers who need clear, actionable steps (not marketing fluff) to get prototypes right the first time.
1. What is rapid prototyping? (definition & standards)
Rapid prototyping is the set of techniques used to quickly fabricate physical models or functional parts directly from 3D CAD data — usually to verify form, fit, and function before committing to high-volume tooling or production. Modern rapid prototyping includes additive manufacturing (3D printing), CNC machining, vacuum casting, and low-volume injection molding. Authoritative sources treat rapid prototyping as part of the broader field of additive manufacturing and prototyping workflows.

Standards matter when prototypes are used for functional validation in regulated industries. The ISO/ASTM terminology standard for additive manufacturing (ISO/ASTM 52900) is the primary reference for AM definitions and process grouping — useful for clear specifications when you request printed metal or polymer prototypes.
2. Common rapid prototyping methods — pros and cons
Below are the most frequently used methods for rapid prototyping, with realistic strengths and limits.
Additive manufacturing (3D printing)
- Methods: SLA, SLS, FDM, MJF, PolyJet, SLM/SLM (for metals).
- Best for: Complex geometry, fast iterations, low-cost concept models, and some functional prototypes.
- Pros: No tooling, fast geometry freedom, good for lightweight internal features.
- Cons: Surface finish and dimensional accuracy vary by tech. Some AM materials are not equivalent to production plastics/metals.
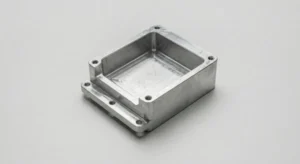
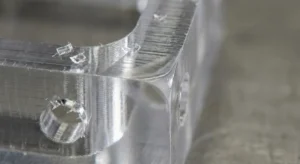
CNC prototyping (subtractive)

- Methods: 3-axis to 5-axis CNC machining for metals and engineering plastics.
- Best for: Functional metal prototypes, tight tolerances, production-like materials.
- Pros: Excellent mechanical properties, predictable tolerances, direct use of production materials.
- Cons: Geometry constraints (undercuts), higher per-part cost for complex shapes.
Vacuum casting (urethane casting)
- Best for: Low-volume plastic parts (10–200 pieces) that need injection-mold-like surface and mechanical behavior. Master pattern is usually 3D printed or CNC machined.
- Pros: Low cost per part for small batches, many available urethane material options.
- Cons: Mold life is limited; not suitable for long runs.
Low-volume injection molding
- Best for: When you want production-like parts and to validate tooling before full production.
- Pros: Production-like materials and properties.
- Cons: Higher upfront tooling cost and lead time compared to printing/casting.
3. Choosing the right method — a decision checklist
Use this short checklist to pick a rapid prototyping method in under 5 minutes:
- Do you need production material (metal/engineering plastic)? → Prefer CNC or low-volume molding.
- Is complex internal geometry required? → Consider SLS or other powder-based AM.
- Are you validating aesthetic finish & color? → Vacuum casting or PolyJet can produce close matches.
- Do you need tight tolerances (< ±0.05 mm)? → Choose CNC or specify post-processing/inspection on AM.
- Is speed the top priority (days)? → SLA / FDM / SLS or CNC rapid machining depending on complexity.
For many practical applications, suppliers combine methods: 3D-print a master for vacuum casting, or CNC a critical feature while printing the rest.
4. Rapid prototyping process — step by step (CAD → prototype)

This is a factory-proven workflow you can send to suppliers as a checklist:
- Design freeze for prototype
- Export solid CAD (STEP/IGES). Include critical dimensions and tolerances on the drawing.
- DFM review / Quotation
- Ask the supplier for a quick DFM / manufacturability review (some providers offer a free DFM for prototypes). Confirm material, surface finish, expected tolerance bands, and lead time. DFM reduces rework later.
- Select process & material
- Supplier confirms: SLA for smooth visual prototypes, SLS for functional nylon parts, CNC for metal/engineering plastics, or vacuum casting for small color-matches.
- Prototype master / tooling (if needed)
- For vacuum casting, supplier will produce a master (CNC or printed) and then mold it.
- Finish & secondary operations
- Specify painting, plating, anodizing, or critical machining. Include specific roughness or surface finish targets.
- Quality control
- Define inspection: first-article inspection (FAI), CMM reports for critical features, and visual acceptance criteria.
- Iteration
- Use prototype feedback to update CAD, then repeat the loop until sign-off.
5. Design for rapid prototyping (DFR / DFM checklist)
Design rules that work across most rapid prototyping methods:
- Specify tolerances only where needed. Avoid ±0.01 mm everywhere; focus on functional features.
- Wall thickness: Keep a minimum wall thickness appropriate to method (e.g., 1–1.5 mm for many AM parts; follow supplier guidance).
- Draft & undercuts: For vacuum casting and molding, add draft angles (1°–3°) and avoid deep undercuts.
- Fillets & radii: Add fillets to distribute stress and ease machining. Sharp internal corners increase tool wear.
- Mounting & fixturing features: Add flat fixturing faces and datum features for consistent inspection and machining.
- Material callouts: Name the engineering plastic or metal grade (e.g., PA12, ABS-FR, 6061-T6, 17-4PH) when you need production-like properties.
- Surface finish zones: Define where aesthetics matter vs function. For instance, specify Ra ≤ 1.6 µm on sealing faces; cosmetic zones can be sanded/painted.
- Threading: Use standard thread callouts and indicate whether threads are formed, tapped, or printed as inserts.

Following these DFM items reduces iteration time and keeps rapid prototyping costs predictable.
6. Tolerances, materials & surface finish expectations
Realistic tolerances by method (rule-of-thumb)
- CNC machining: ±0.01–0.05 mm depending on size and feature (tight tolerances achievable with careful fixturing).
- SLA: ±0.1–0.3 mm (depends on orientation and post-cure).
- SLS / MJF: ±0.2–0.5 mm for general features; better for larger features.
- Vacuum casting: +/- 0.1–0.3 mm depending on mold and material.
Always request an inspection plan for critical features. If you require ISO-compliant inspection or material traceability, include that in the RFQ.

Material selection
- Functional metal prototypes: CNC from 6061/7075 aluminum, 17-4PH stainless, or other production alloys.
- Functional plastic prototypes: Nylon (PA12), PC, ABS, PEEK (in specialty service providers).
- Aesthetic prototypes: SLA resins or polyurethane (vacuum cast) with post-painting.
Cite standards and material definitions when your design will be used in regulated sectors — this clarifies acceptance criteria with the supplier. (ISO)
7. Quality control & inspection for prototypes
For prototypes that validate function, ask for at least one of the following depending on risk:
- First Article Inspection (FAI): CMM or manual checks of critical dimensions.
- CMM report: 3D coordinate measurement for precision fits.
- Material certificates: Mill test reports for metals if mechanical properties matter.
- Visual standard: Agree on acceptable cosmetic defects (e.g., sink marks, print lines) before work begins.
Pro tip: define three critical datums on the drawing and request supplier to datum off them for inspection. This simple step reduces ambiguous measurements and dispute later.
8. Cost, lead time, and scaling to production
Cost factors: geometry complexity, material, post-processing, inspection, and quantity. Additive prototypes are usually cheaper for single-piece complex shapes; CNC is cost-effective for functional metal parts or when tolerances are tight.
Lead time expectations (typical):
- 3D printing (SLA/FDM/SLS): 1–7 days depending on queue and part volume.
- CNC prototypes: 3–10 days depending on complexity and finishing.
- Vacuum casting (with master): 7–14 days to get a run of parts after master/model completion.
If you plan to scale to production, treat prototypes as risk-reduction steps:

- Use prototype feedback to finalize tolerances and critical surfaces.
- If injection molding is the end goal, run a small low-volume injection sample to validate wall thickness and gating. DFM at the prototype stage saves tens of thousands in tooling fixes.
9. Working effectively with Chinese manufacturers — best practices
Many overseas buyers worry about communication and quality. Here’s a compact, factory-tested playbook for smoother projects:
- Send fully annotated STEP or STEP-as-readable CAD, and include a 2-page spec sheet listing material, finish, tolerances, inspection method, and sample quantity.
- Ask for a written DFM response before releasing tooling or master orders. A short list of recommended changes is a good sign of an experienced shop.
- Use visual references: photos, color codes (Pantone), and finish samples. Words like “matte” or “gloss” are ambiguous; attach images.
- Request samples and FAI before full delivery: Approve one part as the golden sample.
- Agree on IP safeguards: NDA when needed; limit CAD access and only provide manufacturing outputs if requested.
- Set clear payment & shipment terms: 30/70 is standard (30% deposit, 70% before shipping) for new vendors. If trust is high, negotiate milestones.
- Visit (if feasible) or use a third-party inspection: Many buyers use inspection services for pre-shipment verification.
These operational steps reduce the common friction points that turn rapid prototyping into a slow process.
10. Quick comparison: Milling vs Turning vs Additive for prototypes

| Criteria | Milling (CNC) | Turning | Additive (AM) |
|---|---|---|---|
| Best for | Complex prismatic parts, pockets | Cylindrical features, shafts | Complex internal geometry, quick iterations |
| Typical tolerances | ±0.01–0.05 mm | ±0.01–0.05 mm | ±0.1–0.5 mm |
| Material realism | High (production alloys) | High | Variable (resins/powders) |
| Lead time | 3–10 days | 2–7 days | 1–7 days |
| Cost for 1 piece | Moderate–High | Low–Moderate | Low–Moderate |
Use turning for shafts and concentric features, milling for multi-axis prismatic parts, and additive when geometry or speed outweighs material fidelity.
11. FAQ — people also ask
Q: What is rapid prototyping used for?
A: Rapid prototyping is used to quickly validate form, fit, and function, to test ergonomics and assembly, and to de-risk tooling and production decisions. Prototypes accelerate iteration cycles and reduce late-stage design changes.
Q: How long does rapid prototyping take?
A: Typical times range from 24 hours for simple 3D-printed parts to 2 weeks for vacuum cast batches or complex CNC-finished prototypes. Lead times depend on queue, complexity, and finishing.
Q: Can rapid prototyping be used for production parts?
A: In many cases, yes — particularly for low-volume production. Metal additive manufacturing and CNC can produce end-use parts; vacuum casting and low-volume injection molding are suitable for hundreds to low thousands of parts, but always confirm material and mechanical requirements.
Q: What documents should I send to suppliers?
A: Solid CAD (STEP/IGES), a short spec sheet with material, finish, tolerance callouts, a visual reference, and inspection requirements. Explicitly mark critical dimensions and datum references.
Q: Is ISO relevant to prototyping?
A: Yes — ISO/ASTM terminology clarifies process naming for additive methods and helps align expectations for material, process, and quality claims. For regulated industries, reference standards and material certification are key. (ISO)
12. Quick templates — ready to paste into an RFQ
Simple RFQ header (copy/paste):
Project: [Part name]
Quantity: [e.g., 1 prototype / 50 pcs vacuum cast]
CAD files: [STEP / filename.step]
Material: [e.g., PA12 / 6061-T6 / PU urethane A]
Process requested: [e.g., SLS / CNC milling / Vacuum casting]
Critical dimensions: [list dims and tolerances]
Surface finish: [e.g., Ra ≤ 1.6 µm on sealing faces; matte paint on exterior]
Inspection: [CMM report for X, Y, Z; FAI; visual]
Lead time required: [e.g., 10 business days]
Shipping: [Incoterm]
Ask for: DFM feedback within 48 hours, a photo of first article, and a PDF quote with lead time and payment terms.
13. Case study (short): From prototype to production
A mid-size OEM needed a functional housing for an industrial sensor. They used rapid prototyping in three steps:
- SLA prototypes for ergonomic & snap-fit validation (2 iterations).
- CNC prototypes in the final engineering plastic for thermal and mechanical testing.
- Vacuum cast a pilot batch (50 pcs) to validate paint and assembly before tooling.
Result: Two weeks saved in the validation phase and a 40% reduction in tooling change requests after mold build — because functional testing was done earlier.
14. Expert tips & traps to avoid
- Tip: Always specify the datum system for inspection — this avoids misunderstandings on coordinate origins.
- Tip: If you need threads, decide early: tapped vs printed vs helicoil inserts — and specify the required strength.
- Trap: Don’t accept “prototype grade” as a substitute for material spec. Ask for exact material designation or equivalent.
- Trap: Expect some cosmetic irregularities on early AM prototypes; if cosmetics matter, choose vacuum casting or post-finish.
15. Resources & references (selected authoritative sources)
- ISO/ASTM 52900 — Terminology for additive manufacturing.
- Formlabs: Rapid prototyping overview and process guidance.
- Wohlers / additive manufacturing definitions and industry context.
- RapidDirect vacuum casting and design guidelines.
- Vacuum casting & prototype workflow references (master model → silicone mold → cast parts).
Conclusion
- Rapid prototyping is not a single technology; it’s a family of methods each suited to different verification goals (visual, functional, mechanical).
- Choose the process based on material fidelity, tolerance needs, lead time, and budget. Use the decision checklist above to pick quickly.
- Good DFM and clear RFQs reduce expensive iterations — always highlight critical datums and inspection requirements.
- When working with Chinese suppliers: require a short DFM report, a golden sample, and explicit inspection criteria to avoid surprises.
Ready to move from CAD to a factory-validated prototype? Upload your STEP/IGES file and drawing now for a free DFM review and a firm quote — We’ll check tolerances, recommend the fastest suitable rapid prototyping method, and give you a realistic lead time for sample delivery.